
Sealant Types, Hinge Alignment & Silicone Curing Times
Cape Town DIYers, Avoid Costly Water Damage With These Pro Tips
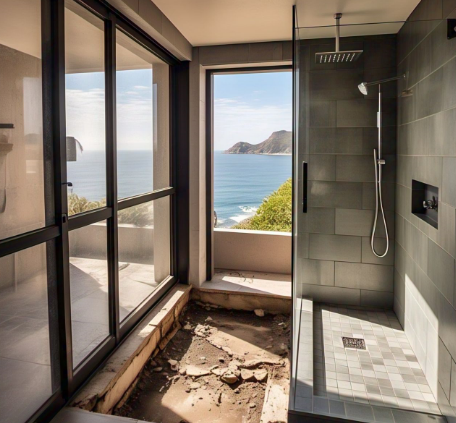
Last winter, we helped a client in Camps Bay fix a shower leak that had rotted their bathroom subfloor. The culprit? A poorly installed frameless glass door that let water seep through gaps in the hinges. Frameless doors look sleek, but one misaligned bracket or skimpy silicone bead can lead to expensive repairs.
Here’s how we install them leak-free—the CPT Builders way—using tricks honed from 15+ years of battling Cape Town’s humidity and coastal salt air.
Tools & Materials You’ll Need
- Laser level (a Bosch GCL 2-50 saves time)
- 100% silicone sealant (not acrylic—we’ll explain why)
- Shim set (plastic, not wood—trust me)
- Diamond-tipped glass drill bit (for hinge holes)
- Painter’s tape (to mask edges)
- Caulking gun with a smooth-release nozzle
Step 1: Measure Twice, Drill Once
Frameless doors need precision. Start by measuring the shower opening’s vertical plumb and horizontal level. Cape Town’s older homes (think Sea Point or Observatory) often have walls that tilt slightly—even 2mm off can cause gaps.
- Pro Tip: Use a laser level to mark hinge points. If the wall bows inward, add shims behind the hinges to compensate.
Step 2: Choose the Right Sealant
Most hardware stores push acrylic sealant because it’s cheaper. Don’t fall for it. In Cape Town’s humidity, acrylic cracks within a year.
We only use 100% silicone (like Sika Silicone 710 ML) for:
- Flexibility during temperature swings.
- Mold resistance (critical for coastal suburbs like Blouberg).
- Long-term adhesion to glass and tile.
Fun fact: Acrylic fails 80% of the time in our winter rains. Silicone? We’ve seen it last a decade in Kalk Bay bathrooms.
Step 3: Align Hinges Like a Pro
Misaligned hinges are the #1 cause of leaks. Here’s how to nail it:
- Pre-drill hinge holes with a diamond bit. Go slow—glass cracks if you rush.
- Temporary fix: Secure hinges with painter’s tape before screwing them in. Adjust until the door swings silently.
- Check gaps: The door should sit 1.5–2mm above the threshold. Any wider, and water sneaks through.
Cape Town quirk: Salt air corrodes cheap stainless steel hinges. Spend extra on marine-grade brass (try suppliers like Builders Warehouse).
Step 4: Apply Silicone Like You Mean It
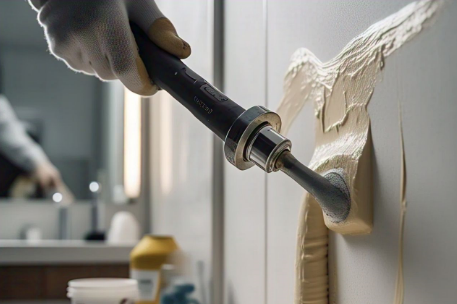
A skinny bead of silicone won’t cut it. Here’s our method:
- Mask edges with painter’s tape for clean lines.
- Fill the gap: Inject silicone until it slightly overflows.
- Smooth it: Dip your finger in dish soap (prevents sticking) and drag it along the bead.
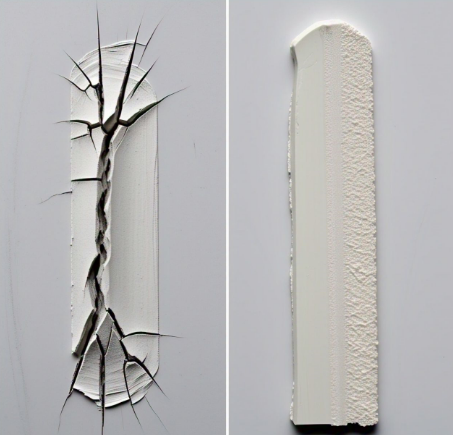
Watch for this: Bubbles in silicone = future leaks. If you see any, redo the section.
Step 5: Let It Cure (No Cheating!)
Silicone needs 24–48 hours to fully cure. Cape Town’s winter humidity can stretch this to 72 hours. Resist the urge to use the shower early—we’ve seen impatient clients peel off half-set sealant.
Common Mistakes (And How to Avoid Them)
- Mistake: Skipping the shims.
Fix: Even “straight” walls in Claremont or Rondebosch often need 1–2mm shim adjustments. - Mistake: Using the wrong drill bit.
Fix: A standard masonry bit will shatter tempered glass. Diamond-tipped only!
When to Call a Pro
If you’re staring at uneven tiles or a sloping floor (common in older Southern Suburbs homes), hire a specialist. Water damage from a botched install can cost R20k+ to fix.
FAQ: Cape Town Edition
Q: Can I install a frameless door on a fiberglass shower base?
A: Yes, but only if the base is reinforced. We’ve had clients in Table View crack flimsy bases by over-tightening hinges.
Q: How do I remove old silicone without damaging tiles?
A: Use a razor blade at a 45° angle. For stubborn spots, try a silicone softener like Dow Corning DS-2025.
Need Help?
CPT Builders offers leak-proof shower door installations across Cape Town. Contact us for a free quote!
CPT Builders
8 The Oval Pinelands
Cape Town
7405
021 012 5370


